Initial Prototype:
From the previous post (here), we discovered potentially problematic resonances at the Mouth Section (due to the low wall stiffness and large span.) We identified, through simulation, the first three vibration modes to be quite low and will probably require treatment.
Several methods of treatment were discussed:
1. Thicker Walls: increases wall stiffness
2. Damping Material: absorbs vibrational energy
3. Metal Stiffener: increases wall stiffness (where thicker walls are not possible)
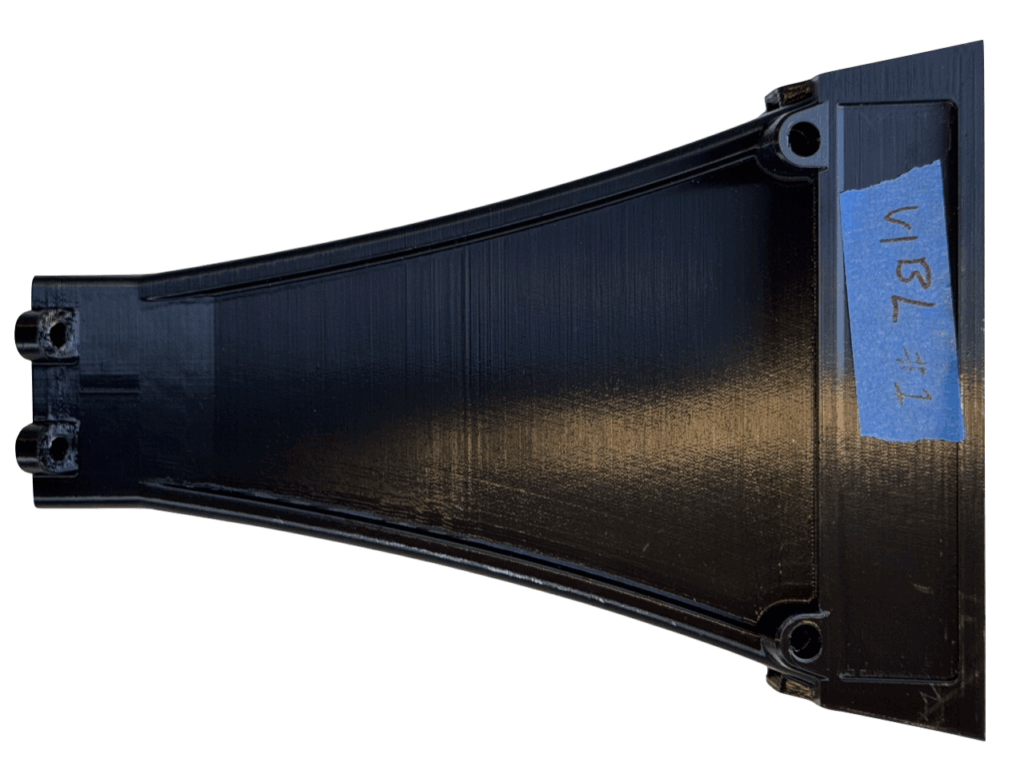
An initial prototype, with the simplest geometry, was designed and printed. This is the baseline design and had thin walls, no damping, and no metal stiffener.
Test Fixture:
A test fixture was designed and built to facilitate testing. The compression driver for this test is the wide band AXI2050 (capable of reaching 500Hz).
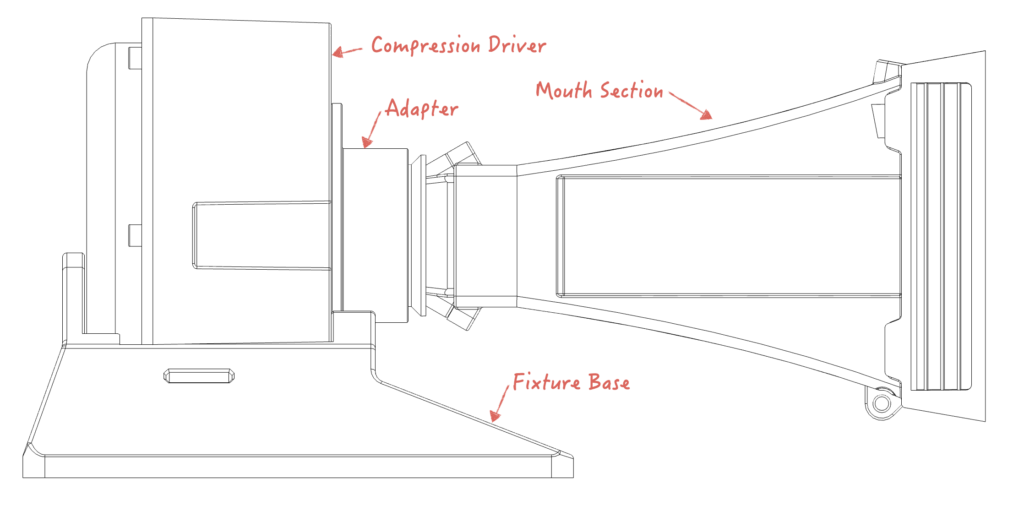
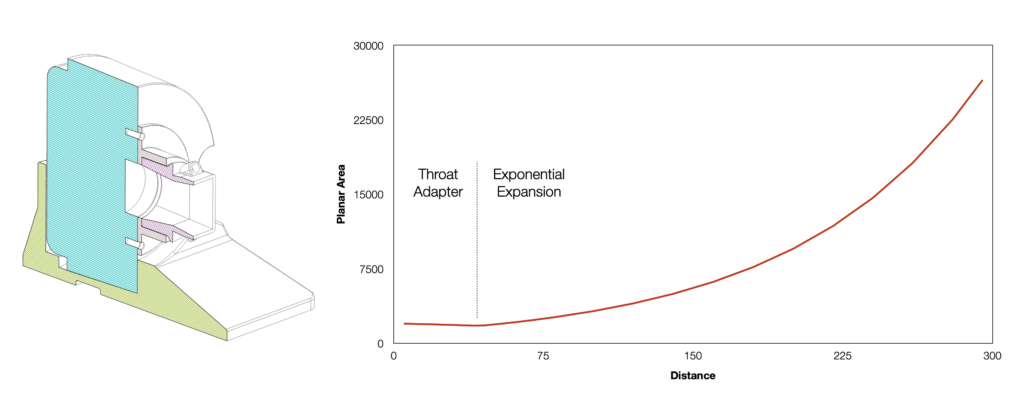
An adapter transitions the CD exit to the rectangular geometry of the Mouth Section. The planar expansion area is shown below. Unfortunately, the throat adapter could not continue the exponential geometry of the Mouth Section. A slight linear reduction was needed to match.
Damping Experiment:
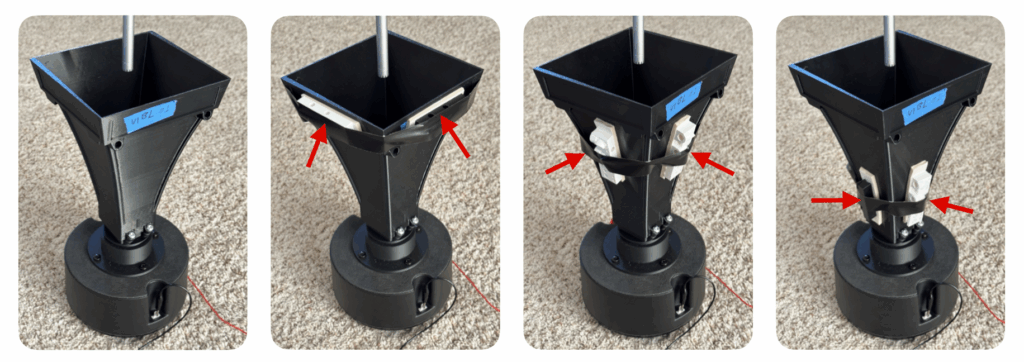
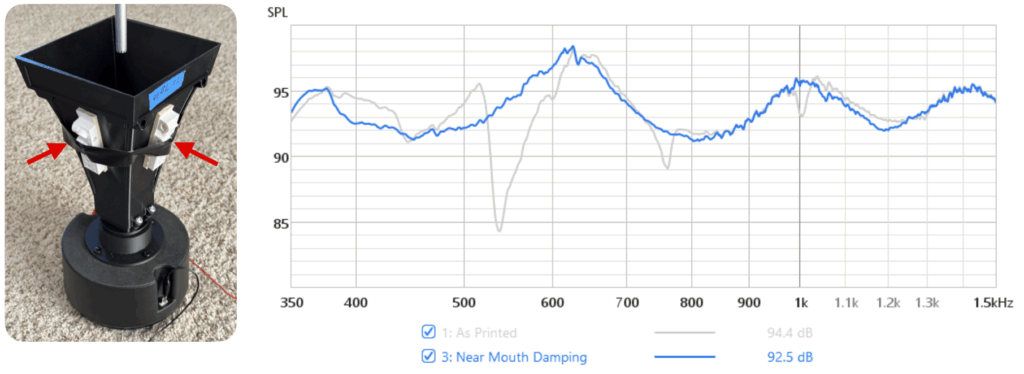
Felt damping material was taped onto the mouth, near the mouth, and near the throat. Sweeps were taken to gather initial data.
Test Setup:
The horn was placed vertically with the compression driver resting on the floor. Fixture Base was not used. Microphone was placed directly in front and centered on the mouth.
Care was taken to swap out each configuration without moving the compression driver or microphone. Capture settings and gains were kept identical for all measurements.
Frequency: 300 – 15000Hz (no smoothing)
Gating: 300ms
Raw Measurements:
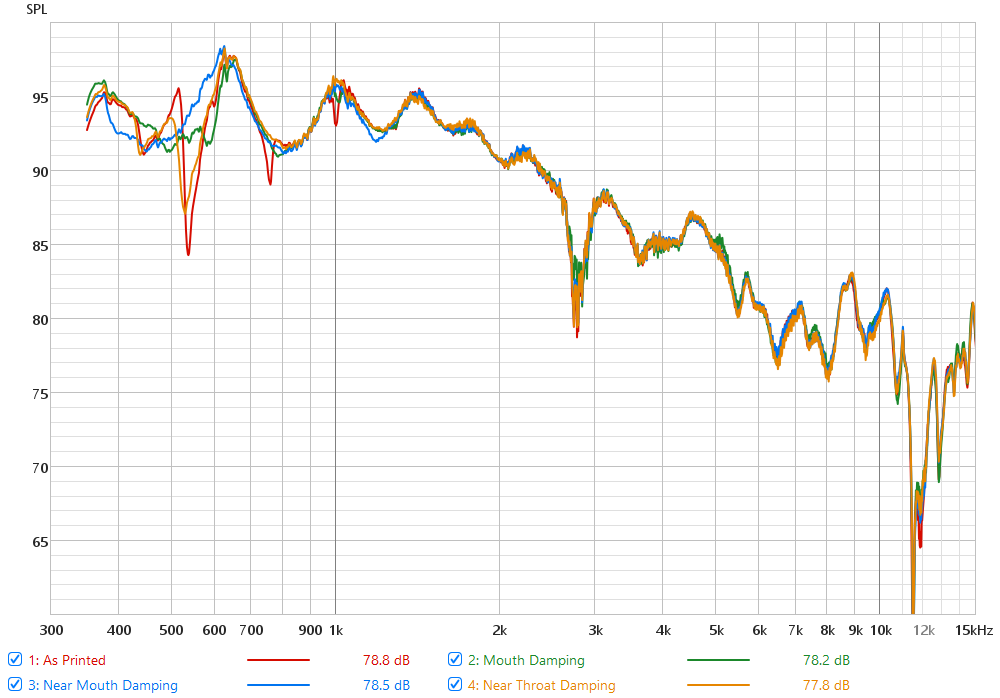
In the FRQ (frequency response), we can see response variations mostly below 1500Hz. There are several resonance dips especially for the “As Printed” config. Above 1500Hz, response variation between configs is relatively small at 4000, 5100, and 11500Hz.
All configs show a big dip at 2700Hz for all configs and this appears to be from mouth diffraction.
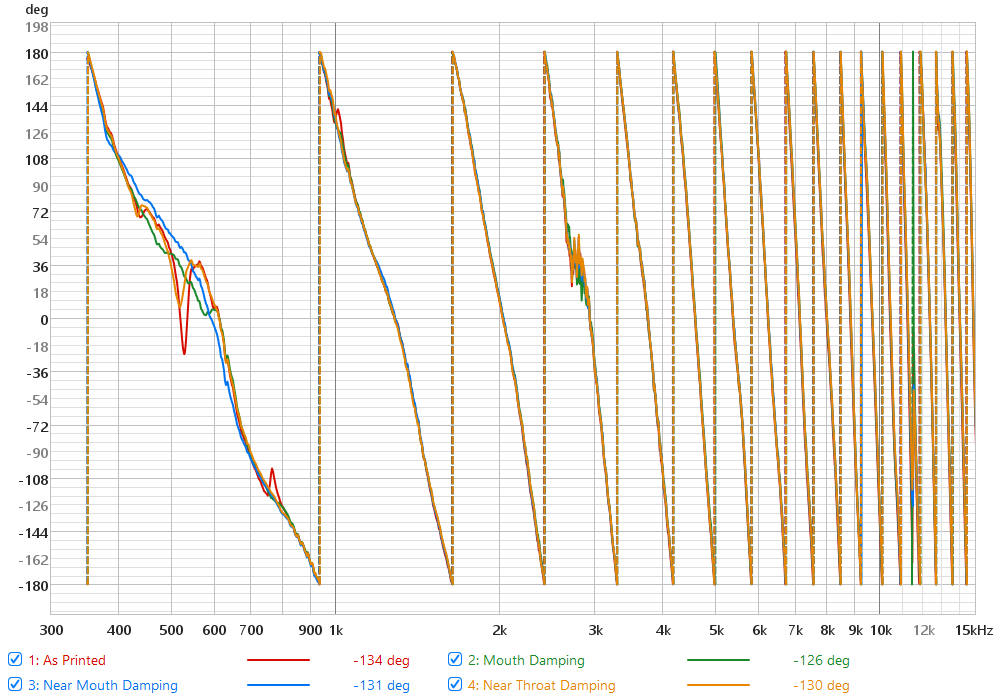
The phase graph is useful for picking out resonances, appearing as dips / spikes surrounding the problem frequency. The pattern is similar to the above FRQ.
Measurements (300-1500Hz):
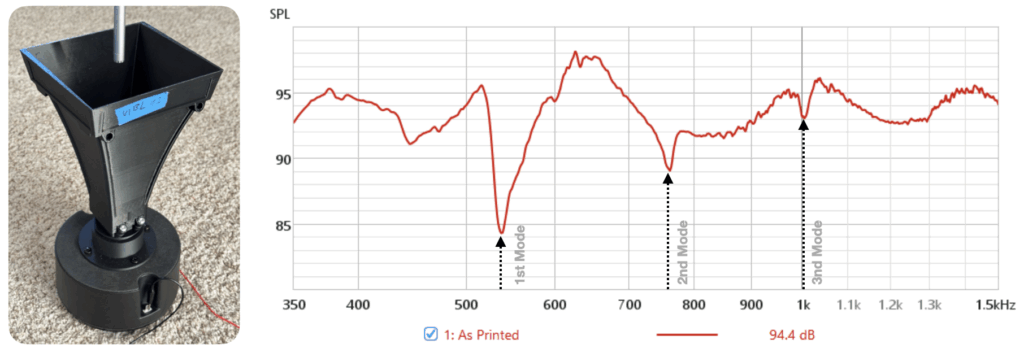
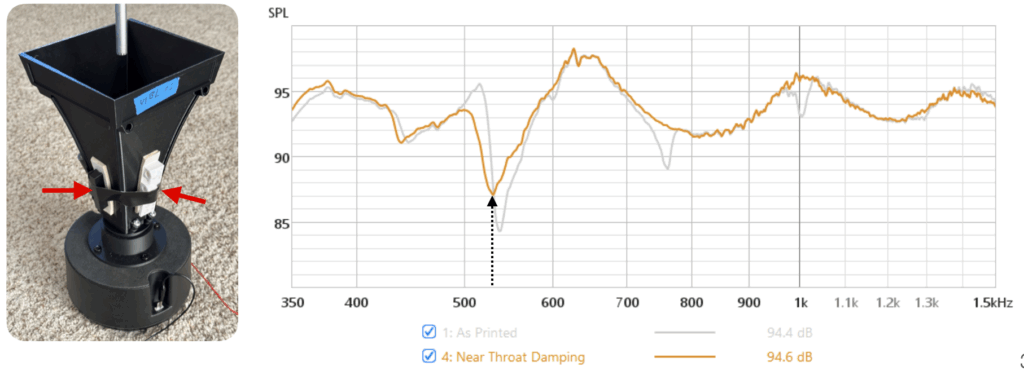
Below, the results have been truncated down to 1500Hz to reveal more details. Configs are individually plotted with the baseline as reference. Three resonance dips are clearly visible and with various degree of improved based on damping.
Baseline: Three dips observed at 540, 760, and 1000Hz which seem to correspond to the modal simulation.
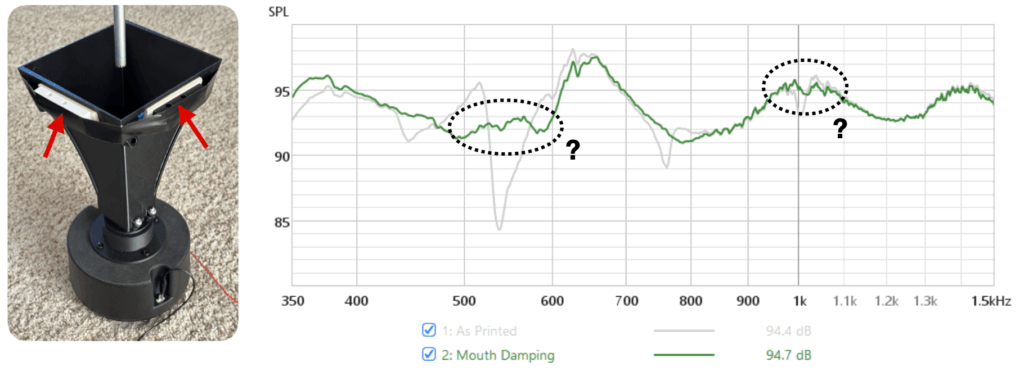
Mouth Damping: Adding felt around the mouth reduced all three dips. But there is still something going on around 540 and 1000Hz.
Near Mouth Damping: Moving the felt down smoothed all three dips even better.
Near Throat Damping: 540Hz dip is back while the other two are gone. This aligns well with the modal simulation as the mouth opening is allowed to resonate again.
Modal Simulation / Correlation:
The three resonances above (540, 760, and 1000Hz) don’t really line up with any of the simulation results on the previous page. This is to be expected because the physical model is very different from the simulation geometries. More material is added at various places and each side of the horn is actually slightly different.
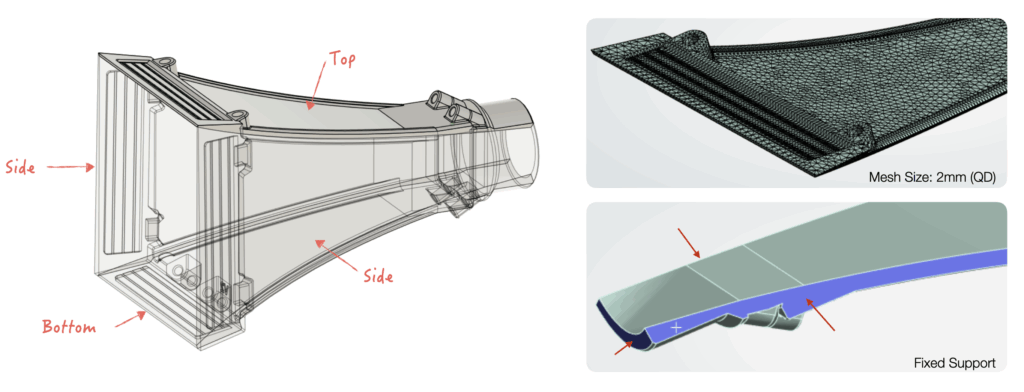
I decided to rerun the modal simulation again with the actual horn geometry. I had to split up the horn into four triangular quadrants (Top, Side, Side, Bottom) as the mesh was too big otherwise.
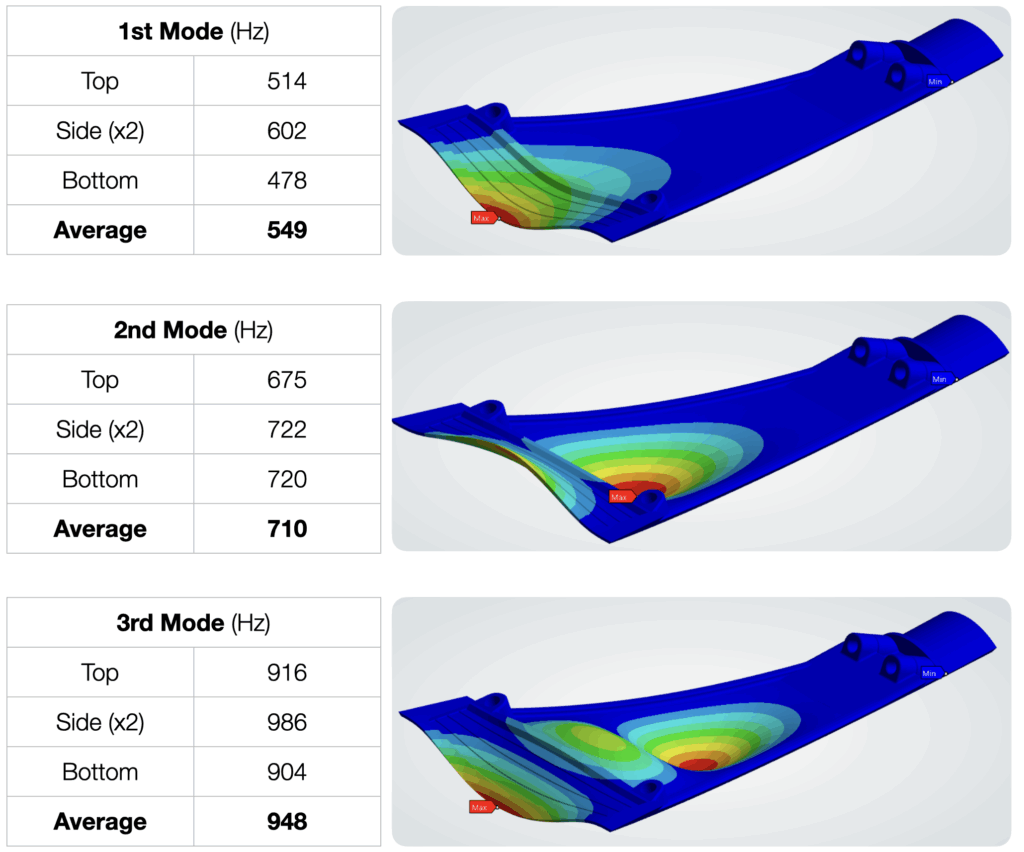
For each quadrant, the splitting flanges and mouth flange were fixed to eliminate torsional and bending modes. Simulation results are shown below grouped by modes. Each quadrant showed slightly different resonant frequencies and a simple average was taken to arrive at a single value. This, surprisingly, actually got within 50Hz of the physical values! I would call this data “usable” for now and have some confidence simulation can be used in design.
Conclusion:
In this post, the first 3D-printed Mouth Section was built and tested. Damping material was added to various locations and the horn was measured and compared to baseline. Several mechanical resonance dips can be observed in the measurement data roughly corresponding the first three modes. The modal simulation was rerun with the actual physical horn modal in order to improve correlation. It was able to get much closer to predicting the problem frequencies.
The next section will focus on the design and testing of various Mouth Section configs to find one with the best damping performance. I now have the basic understanding of where the problems are, how to predict them, and how to treat them.
Leave a Reply